As an Amazon Associate, I can earn from qualifying purchases. Learn more.
An IP security camera system is usually the best if you want to monitor your property in rich clarity. It also has access to advanced surveillance analytics like facial recognition. And if you know how to configure NVR with IP camera, the built-in hard drive provides over 60 days of footage history.
Of course, IP cameras like Foscam and Reolink do have a built slot you can add a MicroSD card for local storage. But with the NVR, you do get real-time stream without the internet and the option to manage all cameras from one point.
FYI: IP camera refers to an internet-protocol camera or a type of CCTV that receives and sends data via a network. NVR refers to a network video recorder or a CCTV system that receives data via a “network” protocol.
You may also Interested: in how to setup ip camera
What Type of NVR and IP Camera Do You Have?
In this guide, the idea is to provide you with the basics of how to configure NVR with IP camera on your own. It’s a pretty straightforward process as we shall see shortly. But before we can go further, what type of NVR and IP camera do you have?
Do You Have A Wired Or Wireless IP Camera?
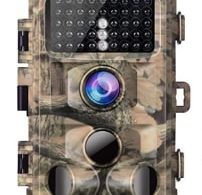
We usually have two types of IP cameras: wired and wireless. A PoE security camera is what we would refer to as a wired IP system. It requires a network (Ethernet) cable to power up and transmit data. And that means it will be the easiest to configure with an NVR.
A wireless security camera is also a type of IP system since it transmits video and audio signals over a network. But in this case, the network infrastructure is a wireless connection (WiFi) and will require a few touches to configure on a PoE NVR.
Do You Have a PoE or Non-PoE NVR?
Similarly, we have two different types of NVR kits. The first design is the most common NVR with a built-in PoE switch. And if you have the right IP camera, the configuration will be an easy plug-and-play.
If you have a non-PoE NVR, you will need an external PoE switch to configure and access wired IP cameras. You could even add wireless provided they have the right network protocol.
Speaking of wireless, we do have the likes of the Hiseeu Wireless Security Camera System, where the NVR is Non-PoE as well. But in most cases, these types of recorders will only work on specific WiFi cameras.
Recommended video
How to Configure NVR with IP Camera?
Well, the process how to configure NVR with IP camera varies with the type of system owned. In our quick guide here, we’ll go through the steps to configure a system where they both have PoE technologies.
The process is more of a plug-and-play if dealing with all systems from the same brand- say you have a Reolink security camera system.
You just need to:
- Plug in your NVR and viewing monitor to the power supply.
- Connect your monitor to the video output of the NVR (use HDMI or VGA cable)
- Next, connect one end of the Ethernet (cat5e or cat6) cable to the PoE IP camera and the other end to the NVR (PoE) port. The camera necessarily doesn’t require plugging into a power outlet if running at a short distance
- Now, power on the NVR and monitor. After the cameras have fully booted (which takes a few seconds), you should have a live stream on the screen.
- Finally, go to the main menu and set up the various parameters (motion detection, recording mode, resolution, et cetera) of your camera.
If you’ll be using an NVR and IP camera from different brands, there are a few things to make it work. And the first requirement is the fact that both devices must support the ONVIF protocol, or else they can’t communicate.
But even with ONVIF compliance, the NVR still won’t configure automatically with cameras. To get everything to work, you’ll need to:
- Repeat the Steps I (1) through (4) above.
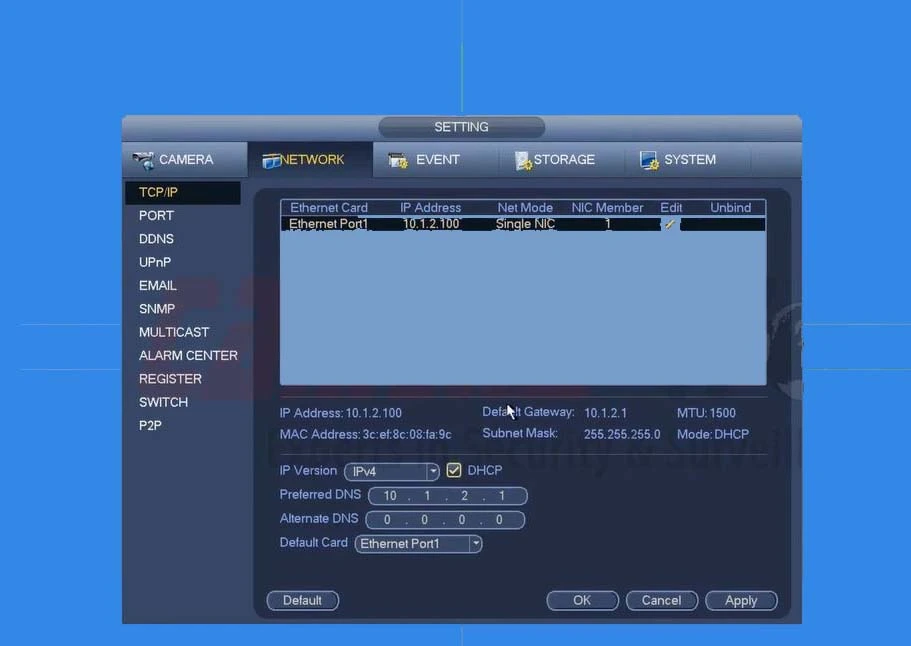
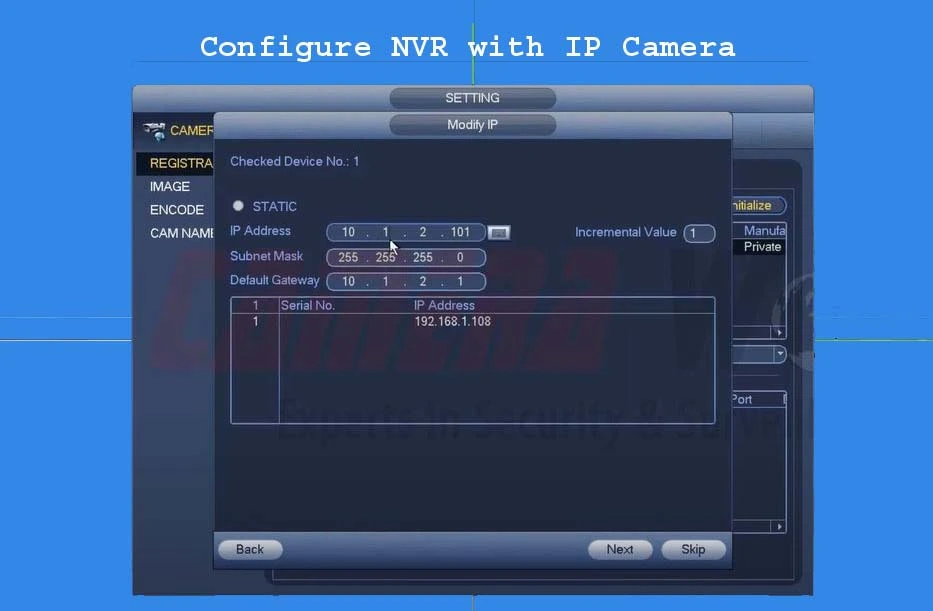
- After the cameras have fully booted, you’ll most likely not have a video signal on the screen. You have to put both systems (NVR and IP camera) on the same network protocol to work. And for that, right-click your mouse and open the menu tabs
- Under the menu, open Configuration >> System >> Camera Management >> IP Camera to access its information
- Next, select your IP camera and click modify (pencil icon) to change the parameters to match the requirements of your NVR
- Now, input the IP address of your camera in the appropriate box and change the “Protocol” from Plug-and-play to ONVIF.
- Finally, click “Apply” and “Okay” to save the changes. When you go back to the home screen, you should be able to view your ONVIF camera.
Internet Connection is Optional
In conclusion, that’s how to configure NVR with IP camera with PoE technology from the same or different brands. It’s much quicker to do compared to when working with a Non-PoE NVR that calls for an external PoE switch.
Just like you use a PoE injector to connect a wireless IP camera to a DVR, the external PoE switch usually requires an internet connection to work on NVR. So, you can’t configure your Non-PoE NVR with PoE cameras without cable internet.
However, when working with PoE NVR and cameras, the system already works around its built-in network. You’ll only need to hook up the recorder to your home router (via Ethernet) if interested in remote access (while away).