As an Amazon Associate, I can earn from qualifying purchases. Learn more.
LaView is a maker of budget security camera systems, with the wireless options going from as low as thirty bucks. Despite the low budget, the CCTV systems have some decent features, including crystal clear videos, human detection, local storage, Alexa/ Google Home, et cetera. But for now, this guide will only focus on how to view LaView cameras on PC or laptop.
Of course, LaView has a mobile app on both the App Store (for Apple devices) and Google Play Store (for Android). The app is actually very intuitive for even non-techies.
However, some situations may prompt you to view your LaView cameras on a PC. The said situations include when:
- You want to take advantage of the continuous live stream on a large monitor
- You’d like to view more than four cameras (maximum on the mobile app) simultaneously. PC interfaces allow you to view up to nine LaView cameras
- Your phone with the LaView mobile is broken, lost/ stolen, or misplaced, but has a computer with internet
- The LaView mobile app is down and you can’t access your camera, but the PC interface is still functional.
Viewing LaView Cameras on PC varies with What You Have
A lot of people know LaView through its line of WiFi wireless security cameras. The category is one of the bestselling names, with thousands of positive customer reviews on Amazon and other online platforms.
Overall, the LaView Security Camera on WiFi is the easiest to pair with the PC, as we shall see shortly. The process is the same for all camera models, including the wireless plugged-in, wire-free, and Pan-tilt. However, you’ll need to have a working phone to complete it (setup process with PC), which can be a drawback.
Besides the wireless category, the LaView Security Camera is also available with DVR and NVR kit. The product line is pretty slim, YES. But you could still connect the device to your PC for larger viewing on a local network or remotely.
Unfortunately, the steps to view LaView security cameras with DVR on PC aren’t as simple as the wireless options. Here, you MUST port forward the IP address of the recorder on your home network router. Otherwise, it won’t be possible to view your cameras remotely when away, with your viewing device on another network.
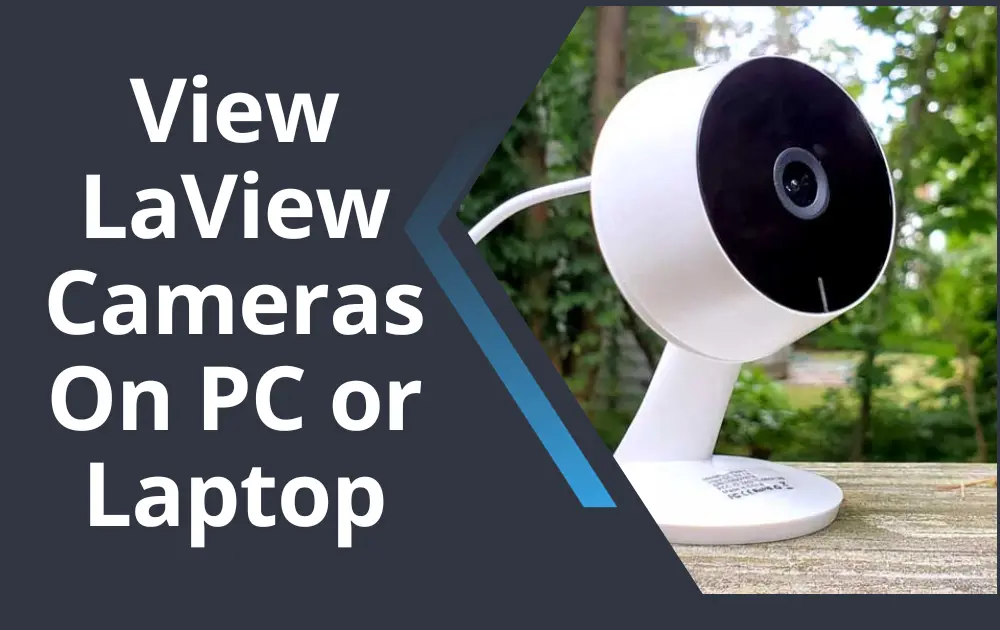
How to View LaView Cameras on PC or Laptop
If you have the LaView WiFi cameras, they are the easiest to configure for viewing with a desktop computer or laptop. The two ways you can do that is by either the web browser or the Android emulators :
Method 1: View LaView WiFi Cameras on a PC via the Browser
The web browser is by far the best way to view LaView WiFi cameras on a PC or laptop. It gives you access to all the benefits we listed above, which applies to both Windows and Mac systems.
To view your LaView wireless security cameras on PC:
- Gather everything you need for the process. This includes your phone/ tablet used to set up the LaView camera, account Login credentials, and the PC with an internet connection.
- Grab your internet-enabled PC (laptop or desktop computer) and visit the LaView remote access address at https://ipc-us.ismartlife.me. The website page will show a QR Code with a prompt to “Scan to Login”:
- To scan the QR Code on the website, get your phone/ tablet with the LaView app and launch it (LaView app). If you haven’t logged into the app, enter your username and password.
- Once on the app homepage, tap the “Me” tab on the bottom right of the taskbar. Then select the “Scan QR Code” icon on the top right of the tab to open the scanner
- When the scanner opens, scan the QR code displayed on the website page in Step 2 above. (If you notice a ”QR code has expire…” error, refresh the page to get another fresh QR code).
- After scanning the QR code successfully, the LaView app will push a prompt to “Confirm Login” to make sure it is you.
- Next, after you Confirm Login, your PC will open up the LaView web interface. The “My Devices” tab is where all the cameras you’ve configured with the mobile app will be.
At the bottom right of the home screen on the LaView web interface, you’ll notice the grids for viewing your camera. There is a single-camera grid, 4-camera grid, and 9-camera grid. Nine Wireless cameras are the maximum you can view simultaneously for now.
In the LaView web interface, you can control various settings of your security cameras. The settings include enabling/disabling audio, rotating the pan-tilt camera up and down, putting the cameras on stand-by/ sleep mode, et cetera.
Method 2: View LaView Cameras on a PC or Laptop via Android Emulators
As the name, an Android emulator is a utility tool that helps bring you an Android experience on your computer PC. The tool is software that you install on your PC. Then, use the software to download the LaView mobile app, just like you do with a smartphone/ tablet.
You’ll find various Android emulators you could use to view LaView cameras on a PC online. Bluestacks is the most used Emulator- we even have it on two of our machines. But there are others, like MEmu Play, that users claim are good.
To view your LaView cameras on PC with the Bluestacks program:
- Grab your internet-enabled PC or laptop and go to https://bluestacks.com/. Then download the latest version of the Bluestacks program (currently Bluestacks 5)
- After downloading, install the Bluesatcks program on your PC. It will take a couple of seconds or minutes to complete, depending on how fast your machine is
- Once with Bluestacks in your PC, launch it. How fast the initializing of the program is will also depend on the performance of your equipment
- Now that Bluestacks has initialized, you’ll notice the Google Play Store app and a few bloatware of the brand. Select Play Store, then sign in to your Google account
- Next in the Play Store, search and install the LaView app. Then log in to the app and set up your LaView cameras the same way you’d do on a smartphone or tablet.
If successful in installing the security cameras on the LaView app in Bluestacks, you can view them on the PC. The app will give you full control of the camera, including adjusting the various settings, just like when working with a smartphone or tablet.
But again, the Android emulator is emulating your smartphone or tablet interface on the PC. And for that, you can’t take advantage of the features of the LaView web interface.
Tip: The instructions to view LaView cameras on a PC with other emulators are just like with Bluestacks. You’ll just have to be careful of the program you install, as some may be malware masked as a PC Android emulator.
How To View LaView Cameras with DVR on a PC or Laptop
If you have a LaView security camera system with DVR, you can view footage locally via a PC monitor or TV.
Whichever of the displays you use, there should be a video-in port that matches the video-out port of the recorder. HDMI is now the most common video port on the recorders, albeit others can have VGA, RCA, or All.
If interested, you can also view LaView cameras with DVR on PC or Laptop via the client software or browser.
To view the LaView cameras on the PC via the client software (CCTV management program), you just need to install it. (You can download the LaView client software at https://www.LaViewsecurity.com/cms/download/).
Once you’ve installed the LaView client program, get your security camera system online. So, connect the Cat5 cable to the ethernet port on the DVR, while the other end plugs to the LAN port of your router. (The computer PC/ laptop should be also online by pairing with the router via either WiFi or ethernet cable).
After you have your systems online, launch the LaView client software on your PC. Then use the onscreen instructions to complete the initial setup.
Once done with the setup, you should be able to view your LaView cameras on the client software without any issues. It’s also possible to view the cameras on the browser by entering the IP address of the DVR in the search box. (Check Steps 4 and 5 below on how to get the IP address of your DVR)
How to View LaView Cameras with DVR on PC when Away
Unfortunately, the initial setup of the LaView cameras with DVR on PC only gives you access when on the same network. That is, your computer or laptop connecting to the same internet as the DVR system.
If you’d like to view your LaView cameras on a different network (when away), you must port forward the DVR.To do that:
Part 1: Get Your LaView System IP Address & Network Ports
- Confirm you have all the LaView cameras with DVR viewing on the monitor/ TV. Then grab a wired mouse and hook it up to the DVR (if it wasn’t already).
- Now, go to your local LaView cameras management interface and use the mouse to click on the “Menu” button. Then locate and select the “Configuration” option
- Under the Configuration submenu, click on the “Network” tab and “Enable DHCP” mode. Then scroll to the “More Settings” tab and write down the values of Server Port, HTTP Port, and RTSP Port.
- Next, go back to the main “Menu” and click on the “Maintenance” tab. Then select the “System” option to open the System Maintenance submenu
- On the System Maintenance, click the “System Info” tab, then select the Network tab to locate the IP address of your DVR and internet router. The IP address of the DVR is the first one listed as “IPv4 Address”, whereas that of the router is “IPv4 Default Gateway”. Write down the two IP addresses
Note: If the IP address shows as 0.0.0.0 or 192.0.0.64, the DVR does not have an active internet connection. So, check out the connection to the router to make sure it’s correct. Make sure the router is also working and has an active connection.
Part 2: Port-Forward the Network Ports of Your LaView System
In this part, we’re now going to port-forward the network ports of your LaView DVR. The process will help you view the cameras on your PC or laptop when away:
- Launch the browser and write down your router’s IP address (IPv4 Default Gateway ) to open its management interface.
- You’ll get a prompt to enter your login username and password. Do note the system is NOT asking for a WiFi username or password. The router login details are usually on the sticker with the Serial-Number and QR code.
- Once inside your router management wizard, locate and select the “Advanced” submenu. Then click on the “Port Forwarding/ Port Triggering” tab.
- In the option to select the service type, click on the “Port Forwarding” button. Then hit on the “Add customer service” tab to open the Ports-Custom Service page to set the port forwarding
- To begin the port forwarding setup, enter a “Service Name” you’d like to use with your Ports- Custom Service
- Next on the“Starting Port” box, enter the values you wrote down for the Server Port (in Step 5).Enter the same values in the “Ending Port” space and your DVR IP address under the “Server IP address” boxes. Then hit the “Apply” button.
- When you hit“Apply”, your Server Port profile (in Step 11) will appear under the Port Forwarding/ Port Triggering section. And that means the port has been port-forwarded successfully. However, you’re not done yet. You still need to port forward the HTTP Port, and RTSP Port of your DVR.
- So, click on the “Add customer service” tab again. Enter a Service Name (different from the one used in Step 10). Then, fill in the values you wrote down of the HTTP Port on the “Starting Point” and “Ending Point” boxes, plus your DVR IP address on the “Server IP address” box. Remember to hit the “Apply” button to save your setting
- Repeat Step 13 above. But make sure you use a different name on “Service Name”. Then under the boxes of “Starting Point” and “Ending Point”, enter the values you wrote down for the RTSP of your DVR.
- If the ports of Server, HTTP, and RTSP have port-forwarded successfully, all three profiles will show under the Port Forwarding/ Port Triggering section. You can confirm the process was successful by checking the ports with an open port check tool like https://canyouseeme.org/.
- Finally, launch the LaView client software on your PC (or enter the IP address on the browser) to start viewing your security cameras.
Note:When trying to view your LaView cameras with DVR on PC via the browser, you’ll get a prompt to enter login credentials. The login details are the username and password you use to access your DVR.
Final Thoughts:
Well, that’s how to view LaView cameras on PC or laptop. It’s a straightforward process to do on your own, with the easiest setup being the WiFi cameras.
Even though easy, we’ve seen setting up the LaView wireless cameras for PC will require your smartphone. If you don’t have the phone (with the LaView app), you can’t complete the setup. And that means you also won’t be able to view your cameras.
As for the LaView cameras with DVR, you can quickly set up the system for viewing on PC with the client software. If you have the IP address of the recorder, it will also be possible to view your cameras on the browser even before port-forwarding.
However, without port-forwarding your DVR system, you won’t be able to view your LaView cameras on the PC when outside the home network. You’ll have to complete the port-forwarding setup (in Part 2 above) to access the cameras when away.