As an Amazon Associate, I can earn from qualifying purchases. Learn more.
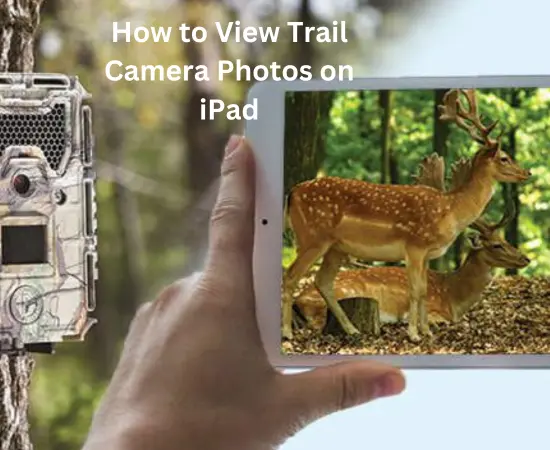
A trail camera is one of the must-have tools for those of us who love nature or goes to hunt. In this article, we’re going to look at how to view trail camera photos on iPad without having to pull down the device or even visit the site.
First things first, trail cameras don’t work like security cameras. Yes, some people do use trail cameras for security in areas the regular CCTV can’t work. However, the system (trail camera) mostly records events as photos or short video clips.
A few years back, the only way to view the photos (or video clips) the trail camera captured was to use a computer. But today you no longer need to carry a computer to your cabin or hunting grounds just to view the camera footage.
Verdict: A Summary of How to View Trail Camera Photos on iPad
- Connect the Apple Lightning to USB Camera Adapter to your iPad.
- Attach the Mini/ Micro-USB data cable to the end of the Apple adapter.
- Plug the Micro/ Mini-USB connector of the data cable to the trail camera
- Open up your iPad, then launch the “Photos” library app
- Next, select the “Import” button to copy the trail camera photos on iPad
- Finally, after importing completes, you can now view the trail camera photos in the “Photo” app without any issue.

How You View the Photos on iPad Depends on Your Trail Camera
In a nutshell, the way you view trail camera photos on iPad depends on which type of trail camera you own:
Do You Have the Traditional Trail Camera?
What we refer to as a “traditional” trail camera is the regular type model most common in the market. It’s the type of trail camera that track the movements of the wildlife and save the photos (and video clips) in the local storage. Then you’ll have to visit the site of the device in person to view the recorded footage.
Do You have the Cellular Trail Camera?
A cellular trail camera is the second type of trail camera you can use to watch and track the daily routines of wildlife. As the name, these game cameras have a built-in cellular technology that builds a wireless connection through local cell phone carriers.
Once connected through the carriers, the cellular trail camera can remotely send pictures to your internet-enabled viewing devices. Thus, you necessarily don’t have to visit the site of the device in person.
The Different Ways How To View Trail Camera Photos On iPad
Again, there are multiple ways how to view trail camera photos on iPad. And the method you opt to use depends on whether you have a traditional or cellular trail camera:
Method 1: Use the Apple Lightning to USB Camera Adapter to View Trail Camera Photos on iPad
The first way you can view trail camera photos on iPad will be to use the Apple Lightning to USB Camera adapter. It’s certainly not the most convenient way, as you’ll have to visit the trail camera location in person.
The Lightning to USB Camera Adapter is a type of cable that connects your iPad to the trail camera. It (the cable adapter) has a connector for the Apple device on one end and a USB Type-A port on the other.
The USB Type-A port plugs the data cable that connects directly to the mini/ micro-USB port of the trail camera. You’ll not need to remove the SD card from the camera. If the Micro-USB port is at a convenient place, you can connect your iPad while the trail camera is still mounted.
How to use the Lightning to USB Camera Adapter with Trail Camera:
To connect the trail camera to your iPad via the Lightning to USB Camera Adapter:
- Make sure you got the right Apple Lightning to USB Camera Adapter. We strongly recommend an adapter directly from Apple over the generic brands
- Once you’ve got the camera adapter cable, connect it to the charging port of your iPad.
- Next, connect a mini/ Micro-USB data cable (not charging cable) to the appropriate port on the trail camera
- After connecting the Mini/ Micro-USB cable to the camera, plug the other end into the Type-A USB port of the Apple Lightning to USB Camera Adapter.
- Immediately you connect the trail camera to your iPad, the Photos app will automatically open. If the app doesn’t open automatically, launch it manually.
- The iPad will organize the trail camera photos (and videos) neatly into albums. But you’ll have to import them into the library to start viewing
- To import the trail camera photos to the iPad, you just need to tap on the “import” button on the right corner of your device. Select “Import All” on the top right corner of the display to copy all trail camera photos to the iPad.
Once the iPad completes importing all the photos and video clips, you’ll get the prompt to “Keep” or “Delete” the content from the attached camera. If you tap the “Delete” button, the system will clean up the data on the SD card, leaving it fresh enough for your Trail camera to record in the next couple of weeks.
Method 2: Use the Apple Lightning to SD Card Camera Reader to View Trail Camera Photos on iPad
The second way to view trail camera photos on iPad is to use the Apple Lightning to SD Card Camera Reader. It’s more like with the Lightning to USB camera adapter, only that the iPad now connects with the SD card.
As the name, the other end of the Apple Lightning to SD Card Camera Reader is a slot to slide “SD card”. So, the method is also less convenient as you’ll need to visit the location of the trail camera to remove the data card.
How to use the Lightning to SD Card Camera Reader with Trail Camera:
As we’ve mentioned, the process to view the trail camera photos on iPad with the Lightning to SD Card Camera Reader is just like with the USB camera adapter.
Once you’ve connected the Card reader to the iPad, the next step is to remove the SD card from the trail camera. Then insert it (SD card) into the slot on the card reader.
After your iPad reads the SD card, you’ll need to import the trail camera photos into the device’s “Photos” library to view them. So, repeat Steps 1 (5) through (7) above.
Method 3: Use the Dedicated Mobile App to View Trail Camera Photos on iPad
The next way how to view trail camera photos on iPad will be to use a mobile app. It’s only limited to the cellular trail cameras, of course. But this method is the most convenient as you get to access the camera pictures remotely from wherever you’re. You don’t need to visit the device location or bother looking for any add-on Apple accessories.
Even better, the dedicated apps for the wireless trail cameras have the option to transfer the recordings to your iPad. The apps also have the option to set up motion alerts that let you know immediately the camera detects movements.
How to use a mobile app to view trail camera photos on iPad:
Overall, the process how to view trail camera photos on iPad wirelessly/ remotely depends on the mobile app in use. But the steps always call for installing the right app the camera manufacturer recommends and creating your account. Then complete setting up the device to start using, which includes viewing, saving, and sharing the captured photos.
Which is the Best Way to View Trail Camera Photos on iPad:
At this moment, the three are the only methods we can confirm on how to view trail camera photos on iPad. The methods are pretty straightforward to do as even the recommended products come with the manual guide to follow.
Regardless, the use of the mobile app is still the most convenient option to view the photos of the trail camera on your iPad. But since we’re talking about a cellular trail camera here, do make sure you get a brand that works with a carrier best in your area.
If you have the traditional trail camera, the Apple Lightning to USB Camera Adapter is the second most convenient way to view the footage on your iPad. Then again, not all trail cameras have a functional Mini/ Micro-USB port. And for that, the Apple Lightning to SD Card Camera Reader is still handy to have.


