As an Amazon Associate, I can earn from qualifying purchases. Learn more.
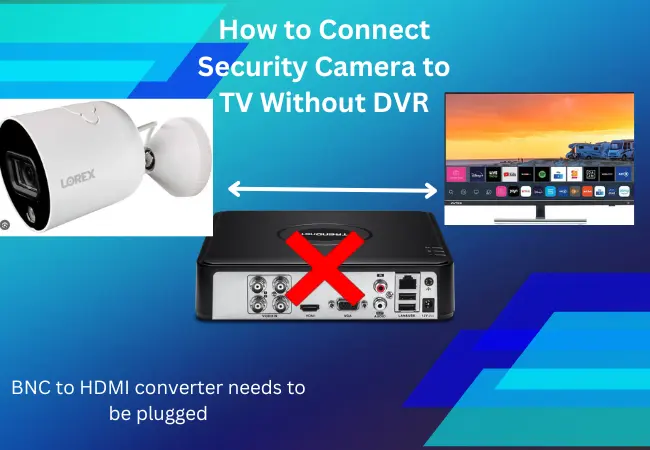
A video surveillance system is now an essential tool in the security package of any home or business. But is there a way how to connect security camera to TV without DVR?
Before we can answer this question, there are a lot of reasons to install a security camera in or around your property. And depending on these “reasons”, your security camera setup to the TV without DVR may be effective or not.
Connecting Security Camera to a TV without DVR Loses Various Features
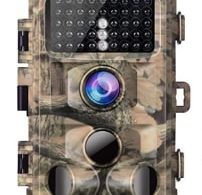
First, the security camera we’re referring to in this topic is the analog type that utilizes a DVR (digital video recorder). The DVR helps you make the most of the cameras, but you can still use them (cameras) alone.
When we say “make the most of the cameras”, we really mean it in this case. Unlike the PoE security camera, analog CCTV cameras can’t process the captured video on their own.
As the name, analog security cameras capture an “analog” video signal. Then the camera sends that analog video signal to the DVR to complete encoding/ processing into a digital video. (PoE IP security cameras have a built-in chip that makes it possible to process digital video on their own).
What all this means is that when we show you how to connect a security camera to a TV without DVR, you’ll only be getting raw footage. The camera won’t be able to record and save it for later use. Hence, the reason we actually don’t have analog security cameras with built-in local storage (MicroSD slot or EMMC).
When a security camera can’t record footage, you’ll only be able to use it for just monitoring or displaying captured scenes. Worse, the camera has no means to connect with the client software or app to adjust the configuration settings.
When You Can Connect Security Camera to TV Without DVR
As just mentioned, connecting your security camera to a TV without DVR means you’ll only be able to view the captured areas. It’s not the best idea, considering you get to lose a lot of features. But the hack can be handy in situations like:
- When you need a simple video surveillance setup to watch an important area
- When you need an inexpensive yet effective way to monitor your home or business
- When you need a CCTV camera setup that doesn’t require WiFi but has 24/7 live viewing
- When the DVR has damage but wants to keep watching your spaces until you fix/ replace it
- When you want to make use of your old analog security cameras- instead of having them correct dust in the cabinet.
On the first point of “simple video surveillance setup”, the hack can help in business. Say, when you want to show your customers a real-time view of a point of interest within the premise.
Also, connecting your security camera to a TV without DVR can be an excellent, “inexpensive” burglary deterrent system. It works best on businesses, where you set the system to display live video on a monitor within the main area where everyone can see.
Steps on How to Connect Security Camera to TV without DVR
If okay without a recording option, this section covers the two ways how to connect a security camera to a TV without a DVR. The steps are pretty straightforward, and the best part of all is that you necessarily don’t need to purchase anything.
Method One: Connect Security Camera to the TV with an RCA Connector
In this method, the idea is to connect your security camera to the TV with BNC-to-RCA cables.
Step 1: Gather Everything You Need for the Hack
As with any other hack, the first step to connect your security cameras to a TV in this manner is to gather everything needed. And the various items you’ll need include:
- An RCA cable
- The security camera you intend to use
- Power adapter (for the camera)
- A TV set with RCA inputs
- A waterproof, electrical tape
- A pair of scissors or a blade
Step 2: Prepare your Security camera Cables
Once you’ve got everything needed, prep the cable you’ll be using to connect the security camera to the TV.
The end of the analog CCTV cable usually has a male BNC connector. So, this step requires converting this end of the cable from BNC to RCA. (TVs have female RCA inputs [not BNC like in the DVR] that only accepts RCA male connector).
If your reason for this hack was to have a quick surveillance camera, you can make your own BNC-to-RCA cable. You just need to cut off the BNC connector part of the camera cable and attach an RCA connector (cut off the RCA cable).
Make sure you connect the two cable pieces in their respective polarities (live wire to live wire and neutral to neutral). If you connect the polarities of the cables incorrectly, the camera won’t work.
Also, remember to cover each connection of your DIY BNC-to-RCA cable with electrical tape. It will help avoid the naked hot and neutral points from coming into contact, as well as protect them from water.
Prep Your Security Camera Cable like a Pro
Instead of the DIY improvisation, you can make your CCTV camera cable pairable with the TV using a ready-made BNC-to-RCA connector.
The BNC-to-RCA connectors cost about five bucks, and they’re not only easy to plug together. But they also leave a clean, professional look in your connection.
Step 3: Power up Your Security Camera
Once your BNC-to-RCA cable is ready, the next step will be to provide power to the CCTV camera. It’s also an easy step, as you just need to connect the 3.1mm power plug of the camera to the power supply adapter.
In most cases, the power adapter comes together with the security camera. But you can also improvise with any other adapter (like that of routers) on a similar electrical rating.
After you have a power adapter compatible with your CCTV camera, plug it into a standard power outlet.
Step 4: Connect the Security Camera to the TV Inputs
Now, grab your Security camera BNC-to-RCA cable and plug it into the RCA input of your TV. Depending on the type of TV you have, the RCA inputs can be at the back, on the side, or at the bottom. Then don’t forget we’re connecting the RCA end of the CCTV cable to the RCA-video input of the camera.
Step 5: Enable the Video Input of the RCA on the TV
Did your security camera show a live video on the TV after you plugged in the RCA connector of the cable? It should. If the camera hasn’t displayed a live stream yet, chances are the TV is in another video mode (HDMI/ VGA) or off.
Therefore, to start viewing your security camera, turn on the TV. Then use the TV remote or manual buttons to select the video input of the RCA.
Method Two: Connect the Security Camera to the TV With a Converter
Fortunately/ unfortunately, some latest smart TVs only support HDMI for the physical inputs. And to view your security cameras on such a TV, you’ll have to convert the BNC end of the CCTV cable to HDMI.
Different from the RCA cables, an HDMI cable consists of many tiny wires soldered to a single connector. Thus, the only way to have a BNC-to-HDMI connection for your security camera will be to get a BNC-to-HDMI converter. The converter costs as low as $20 to $70+ depending on the quality and speed.
Once you have the BNC-to-HDMI converter, the next step is to connect your camera and TV. It’s an effortless process, as you only need to plug the camera video cable into the BNC input on the converter. Then plug one end of an HDMI cable into the HDMI input of the converter while the other end connects to the TV.
A crucial point you should know is that the BNC to HDMI converter needs to be plugged into a power supply to work. The power requirements vary with the converter in use, where some work with an adapter and others with a USB.
Once all the devices are connected and powered, the final step is to set your TV to HDMI video mode. The security cameras will then display live video instantly.
Note:
If your TV has no HDMI port, chances are it will have a VGA input. But since the CCTV camera only comes with a BNC output, you’ll need a BNC-to-VGA converter.
The steps to connect your security camera to the TV with a BNC-to-VGA converter are more or less like with a BNC-to-HDMI converter.
Here is a video about how to connect cctv camera to a tv without DVR
Do You Want to View Your Security Camera with Audio?
Whether you need a temporary or longer-term fix, that’s how to connect a security camera to a TV without DVR. And as we’ve mentioned severally, the process is pretty straightforward for even a non-techie.
Once done with the setup, how clear the live-stream videos will be varies with the resolution of the security cameras. But since we’re using the cameras without a DVR to adjust the settings, they will live stream on their maximum resolution.
If you’d like to use your security camera on TV with audio, analog CCTV cameras don’t have a built-in mic. Thus, will need an add-on external CCTV mic to capture audio.
Nevertheless, the audio plug of the CCTV camera cable comes with a BNC connector. For it to work with the RCA audio input of the TV, you’ll need to convert the camera audio cable from BNC to RCA output (either with DIY improvisation or a BNC-to-RCA connector).