As an Amazon Associate, I can earn from qualifying purchases. Learn more.
We all know you need an NVR box to set up an IP security camera, right? Wrong… IP (internet protocol) camera is a type of CCTV that uses a local network to operate. Hence, the reason the pioneers also called its management console a Network video recorder, or simply NVR. However, it’s not a must you have this recorder. In this article, we’re going to show you how to connect wireless IP camera to PC and still view or record real-time videos.
Considering we’ve already talked about connecting CCTV cameras to a computer with a cable, this topic will primarily focus on WiFi devices. Of course, the wireless security camera we’ll be using for our reference does come with an integrated PoE port. But as we shall see in the article, this port is just a temporary bridge that we’ll remove after successfully crossing.
Understanding the Wireless IP Cameras vs PoE IP cameras
Just as the name, both PoE and Wireless IP cameras are network systems. The main difference is that the former uses a wired channel to communicate with the viewing or recording device. However, the Ethernet cable the camera uses for video also provides power. So, you necessarily don’t need to plug in the power cable, apart from few scenarios.
On its end, a wireless IP camera uses its built-in transmitters to send data to the receiver. The transmitter here comprises an access point at either 2.4GH or 5.8GHz frequencies. It can also be analog radio frequencies (RF) like those used by the traditional baby monitors, or else WiFi access points.
As we may have mentioned in our previous posts, wireless IP technology can truly come in handy in places incapable of wiring. Of course, there are power cables to worry about, but battery-powered wireless security cameras are 100% wire-free. So, you can mount in about any location of the compound for as long it can seamlessly communicate with the receiver.
As for the question of connecting a wireless IP camera to the NVR, it’s totally possible if the recorder is compatible. The hack will be much easier with a wireless NVR, but even the PoE models can work. You just need to build an access point in your PoE NVR using an external access point device. The same should work if you would like to turn your PoE IP camera wireless. But then, that will be a lesson of another day.
How to connect Wireless IP Cameras to PC
To be honest, getting your wireless IP camera to work on your PC should be easier than with the PoE security cameras. The reason we’re saying this is because you won’t need to buy a PoE injector or Switch.
However, you’ll need to have the surveillance client software installed in your Windows or MAC machine. The CCTV manufacturers usually include the software CD together with other accessories of the cameras at no cost. If not, you can go to their website and download it, as we did with SwannView Link some time back.
SwannView Link is the official software if you want to know how to view swann camera on PC. True, quite a number of users have been complaining of bug issues, but the company has recently released a new version with the fixes and improvements.
Besides, quite many Swann cameras are ONVIF compliant, which means you can use third-party software such as Blue Iris. However, the maker, like most others, has never been friendly when asked about ONVIF support. So, you might need to run the compatibility test on your own- that’s if the software from the maker doesn’t work out.
In any case, here’s a brief guide on how to connect CCTV camera to desktop without DVR, or rather NVR. The two methods we’re going to look at involves using either the Client software or a browser.
Part A: Wireless IP Camera to PC Client Software
What You Need:
- Power adapter
- Active internet
- Desktop or laptop
- Wireless camera (with PoE)
What to Do:
*In this guide, we’re going to use the Lorex LNC100 camera for reference. However, the method is pretty similar without other wireless WiFi cameras.
Step 1: Power your Security Camera
Connect the power adapter to your security camera and plug it into the electrical outlet.
Step 2: Connect the IP Camera to the Internet
Similar to smartphones or laptops, your wireless camera cannot auto-connect with the WiFi that it has never used before. So, in this step, you’ll take one end of an Ethernet cable and plug it into the PoE port of the camera. Then, take the other end and connect to the router.
Also see: How to Setup IP Camera Without Internet
Step 3: Install the Surveillance Client Software on your PC
That’s right. Download and install the client software that the manufacturer of your camera recommends. So, in this case, we’ll install the L-View Client since our demo camera is a Lorex brand.
Step 4: Launch the Client and Camera
Once the Client software completes to install, launch it. It will show your wireless camera under the “Auto search”.
Note, the camera and the PC have to be on the same local network (internet router) for the software to detect it.
When your camera appears, right-click its ID name and select “Web Configure”. The device will ask for the administrator login credentials, namely the username and password. If it’s a new camera, you’ll use the default username and password listed on the user manual that came with the system
Step 5: Configure the WiFi Settings
The idea in this step is to set up the camera for wireless connectivity. So, on the Web Configure window, click Network>WiFi Security>WiFi Scan. Then, select your WiFi SSID (WiFi name), enter the password, and click the “Save and Apply” button.
Step 6: Confirm the WiFi Settings
In this next step, we’re going to test the WiFi connection of our camera. It’s not a must but it can help ensure the settings have been successfully configured. Therefore, go back to the Network>WiFi Security and click the “WiFi test” button.
Step 7: Remove and Reconnect
If your camera WiFi test is a success, it means the configuration setup was successful. So, you can now unplug the Ethernet cable connecting the camera to the router. Then, go back to the Client software home and double-click the camera to reconnect it.
You can now view real-time videos and even save the recordings to the local drive of the PC.
Part B: Wireless IP camera to PC Browser
Other than the Client software, you can also connect your wireless IP camera to a PC while using the browser. The method can be effective in case you lose the software CD that the CCTV company provided.
Directions:
- Repeat the Step (1) above
- Repeat the Step (2) above
- Download and install the IP search tool (also called SADP) of your camera brand.
- Launch the SADP tool to pick the IP address of the camera for our next step. Note, the camera and the PC you’re using should be on the same network (router) for the search tool to detect it.
- Copy the “IP Address” of the camera that you’ve just picked from the SADP tool into your browser (preferably Internet Explorer).
- The camera will ask you to log in with your username and password. If it’s a new camera system, you can log in with the default username and password as shown in the user manual.
- After a successful login, click the “Configuration” tab, then go to Network>Advanced Settings> Network>WiFi. Select your WiFi name, key in the password, and click the “Save” button. Now your camera can connect to the router wirelessly. So, you can unplug the Ethernet cable.
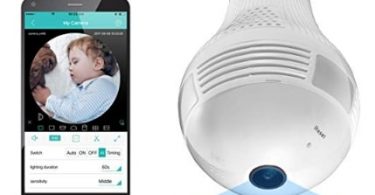
At this point, you should be able to view your wireless camera on the browser using its unique IP address. However, some systems, like Laview WiFi cam, might ask you to install a browser plugin before you can start streaming the footage.
Common Related Questions
Can I connect an IP camera directly to my computer?
Yes, you can connect an IP camera directly to a computer and view real-time videos. You just need to set the camera and computer on the same network, whereby they’ll have the same IP address scheme. The IP address you assign to the camera is what you’ll use to view it on internet explorer or any other supported browser.
How do I view my wireless camera on my computer?
There are three different ways you can view a wireless camera on a computer. For one, you can use the Client software that the manufacturer recommends as compatible with their system. Alternatively, you can view the camera on the browser while using its unique IP address as the URL. In the third way, the trick is to use the generated real-time streaming protocol (RTSP) URL on a compatible media player, like VLC, on the same local network.
How do I connect my wireless camera to my laptop?
When we speak of a PC, the term usually refers to a desktop computer (Windows/ MAC) or laptop. So, to connect a wireless camera to a laptop, you’ll use either the Client or the browser as shown in our two setups. If not that, you can use an emulator like Bluestack to download the smartphone app of that camera. The camera app should work just like with your phone, only on a larger display.
To Conclude:
It’s not a must you have a DVR or NVR to view your PoE or wireless IP camera. Thanks to the built-in network technology, you can connect the system to your laptop or desktop computer very easily. And the best part, you could even save the recordings, either activity-triggered or 24/7 continuous, to the hard drive of the PC.
As you connect your wireless IP camera to a PC with either the Client Software or browser, don’t forget about the local network. Both the camera and the PC has to be on the same network, featuring a similar IP address scheme. That means the first three octets should be similar. The fourth octet is usually the unique ID of the connected device, which means it should be a different one to avoid IP address conflict.
Note, you can use the browser config or else an emulator like Bluestacks for wireless cameras, such as Wyze cam, that don’t have an existing PC software.