As an Amazon Associate, I can earn from qualifying purchases. Learn more.
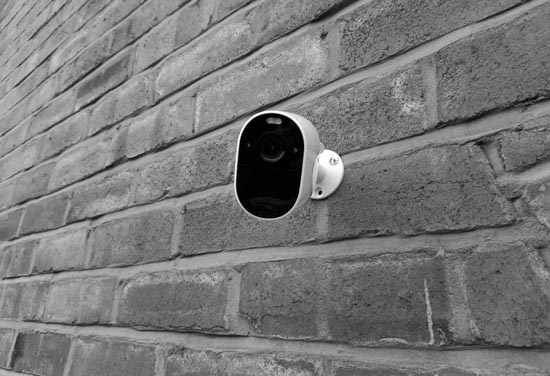
As a DIYer, knowing how to run security camera wires through soffit can be of greater good than you think. It doesn’t matter if you are planning to run the central hub from the attic room or your study room. The soffit allows you to hide the cables completely, minimizing exposure and compromising the effectiveness of your system.
As we know, outdoor security cameras are the most crucial part of every surveillance ecosystem. When properly positioned, they allow you to see what’s going in and out, thereby giving you time to act accordingly and in time.
In case your CCTV system is exposed, however, the potential burglars can destroy it to allow them to move in without detection. For this reason, you must mount your cameras high, then hide the cables to protect them from getting cut.
Can I use A Cable Raceway Instead of Soffit?
Sure, you can use the cable raceway to hide your security camera wires as well. The good thing about the soffit, though, is that you get to hide the wires completely underneath it. No outsiders would ever know about it unless you have told them.
Another thing, most cable covers are limited to the color choices, which means you may not find the exact match for your house. But if your house has soffit, you can run your wires without spoiling the aesthetic appeal of your property.
By the way, the hiding of the wires applies to all CCTV systems, except the battery-powered wireless security cameras that need no cables. For the wireless multi-channel NVR units, you may still need to connect your cameras to the wall outlet for power. And whethe r they’re for the video or power, the cables have to be hidden as they’re an integral part of the system.
Crucial Tips to Consider When Running Security Camera Wires
Technically, most of the latest CCTV systems are true plug-and-play that you can personally install without hiring professionals. Even with the wiring, there’s nothing hard about it if you’re not afraid of getting dirt on your hands.
That being said, however, there are three words you need to consider before starting your installation. They include:
What- do I need for the setup
This includes the list of everything that you need to complete your wiring. Luckily, most top-choice security firms usually pack their systems as a complete kit, including the cables and mounting accessories [screws and anchors]. So, what you need is your household tools, specifically screwdrivers, ladder, and maybe a drill.
Where- are my security cameras
The answer for this one helps in determining aspects, such as the length of the wires to have and the kind of work involved. If the central hub [DVR or NVR] is hidden somewhere in the attic, your work will certainly be easier than when running the cables from the living room.
Both the attic and soffit are closest to the rooftop, which means the distance to the cameras is shorter.
How- is my security camera system connected
That’s right. The way your security cameras connect to the hub can also determine how the cables will run. Each type of CCTV system has its unique design that fits a specific setting and installation.
For a model, an IP PoE security camera system will require you to connect a single Ethernet cable for power and video transmission. So, the wiring will be pretty quicker than the analog BNC connection that needs two sets of wires- video and power supply.
Of course, there’s a two-in-one Siamese BNC cable, but still you’ll need to plug the video head into the DVR unit. Then, the power head that connects to the wall outlet is close-by to the DVR.
Meanwhile, a wireless security camera system has the simplest wiring in all. The cameras need only the power cable, which you can comfortably plug to an outlet in the attic or the closest room.
How To Run Security Camera Wires Through Soffit
Once ok with the WHAT, WHERE, and HOW, you can comfortably proceed with the installation and wiring. If you had already done the setup before and you just need to hide the wires, the process should be straightforward and quicker.
But if it’s the first time, you should first connect the cameras while on the table to make sure they’re working fine. Then, disconnect and carry on with the wiring process if positive everything is working as expected.
Here is a brief setup that you can use to run the CCTV cables through the soffit easily and effectively.
Scenario 1: Wiring with a Drill
In this method, you’ll need to have a drill at hand as you’ll be boring some holes on the wall and ceiling. The technique can work with any soffit material, including vinyl and aluminum.
Before anything else, the first thing to do is prepare all the tools and wiring accessories you’re to use. In this case, you’ll need to have:
- Drill and bits
- Screwdriver
- Fish rod
- Flashlight or headlamp
- Camera wires
- Electrical tape
- Hole saw [optional]
- Grinder [optional]
Directions:
- Remove the soffit in the place where the wires will pass through. If you’re mounting a new camera, measure the width to cut a piece of wood for it. The wood piece will help you mount the came through soffit
- With the drill, make a hole in the wood that you’ll use to feed wires of the camera. You can use a hole-saw bit to make a large hole that will fit all the wires
- Make smaller holes [on the wood] for the camera’s mounting screws. You can use the template sticker that came with the security cameras to ensure maximum accuracy.
- Grab the fishing rod and tape the start of the camera cable to one of the ends. Then, push the fish rod through the hole that you’ve created into the attic space. At this point, you’ll need to pull the other end of the fishing, which means the attic space has to be accessible from the inside of the house.
- If you have the recorder set in the attic, well and good. You’ll just need to plug in your cable to the port. Then, repeat step #1, #2, #3, and #4 until you finish connecting all the system cameras. But if your recorder is in the room below, you’ll need to make another large hole for the cables.
**Remember, the attic floor is probably the ceiling of the room beneath. So, make your hole near the route used by the electrical wiring. But be careful not to electrocute yourself or cut your house power supply**
- After making the hole, push the cable/s down using the fish rod, in which case it will come behind the wall.
- Now cut a hole in the wall and pull out the wire and connect to the system.
Please note, you can also pass the cables on the wall of the room if you don’t want to cut it. You just need to drill your hole such that it lines over the wall, then drop the cables and clip them neatly.
Sadly, however, the cables will now be exposed, thus, you may need concealing them with the raceway.
Alternative: Wiring Without a Drill
Whether you do or don’t have a drill at hand, this method enables you to run the cables without boring the ceiling or wall. It involves running the cables from the attic to the soffit through the gable vent. So, your surveillance hub has to be in the attic area.
More on that, the gable vent should be closer to the roof overhang where we have the soffit lining. Hence, making sure the cables take the shortest path possible to minimize exposure. The soffit also has to be vinyl as it’ll be easy to make a hole if you need to.
What you’ll need
- Screwdriver
- Fiberglass fish tape
- Camera wires
- Electrical tape
Directions:
First, you’ll need to prepare your tools, accessories, and working space. So, you’ll have to remove the vinyl near the gable vent and the different spots where your cameras will be.
Second, Pierce a hole in the gable vent screen [using screwdriver]. And in case your soffit is directly connected with the attic, you won’t need to use the gable vent. Just create a simple path that your cables can penetrate without issues.
Next, Grab the fish tape rod and secure the start of the camera cable to one ends. Then, push the fish rod through the hole into the attic area where you have your surveillance hub.
In case you have multiple cameras, you can take advantage of the various Soffit vents and use them to reach the cables to the camera positions. Only remember to replace the vents to ensure maximum airflow circulation into the underside roof and attic.
Final Verdict
Truthfully, knowing how to run security camera wires through soffit can be more helpful than methods like cable raceways. It allows you to completely hide all the wires, protecting them from being tampered while still retaining the aesthetic appeal.
Of course, the installation process will not be an easy one, especially if the cables will route through the attic to the basement. So, you may need to have an extra hand from a friend or any other adult. Furthermore, you’ll need to be very careful when fishing the wires from the attic area since the floor is mainly ceiling drywall. Thus, it won’t support your weight, and you could fall through.
Most importantly, take note of the distance you’re running your security cameras wires to avoid voltage drop issues.


