As an Amazon Associate, I can earn from qualifying purchases. Learn more.
Blink is yet again one of the best security cameras without a subscription. Yes, you still need to subscribe to a monthly cloud plan for real-time live recording. But in this quick guide, we’re going to show you how to add Blink camera to sync module and take advantage of the free local storage.
Unfortunately, the “free local storage” privilege isn’t available to everyone. You can only be able to use it with the latest Blink cameras and sync modules.
Why Add Blink Camera to Sync Module
The Sync Module is a crucial part of any Blink security camera. In the largest part, it usually serves as a point of collection for up to ten cameras. Thus, making it easier to pair many of them to your home WiFi- remember every router has a limit of connected devices.
All the Blink cameras, except the video doorbell and Mini-series, require a Sync Module to function. The Module creates a bridge between the cameras and Blink servers, which enables access to the footage via the app.
Blink has also claimed the Sync Module helps minimize energy usage on the battery-powered security camera options. But we’ve not been able to put the theory to the test as these cameras don’t work without the Module.
Nonetheless, we’ve been able to confirm that the built-in USB-A port on Blink Sync Module for local storage does work. Then again it also depends on whether you have the original Sync Module or the second-generation model.
Original Blink Sync Module vs Sync Module 2
Basically, the Blink Sync Module 1 (original) and Sync Module 2 are similar in design, plus most of the features. Rectangular shape, LED indicators, WiFi protocol, operating temperature, and built-in ports are a few of the likenesses.
However, when you add Blink camera to Sync Module 1, don’t expect to have local storage. The system does have a Type-A USB port, for sure. But Blink claims the port on the original unit was initially meant for testing only. Thus, doesn’t save the clips as with the Sync Module 2 when you insert a USB drive.
The stick drive you insert to your Blink Sync Module 2 for local storage must be 1GB to 256GB to read. It also must be correctly formatted, albeit you might get a prompt to reformat after inserting it for the first time.
Unfortunately, the Blink USB storage option is still a little inconvenient compared to the MicroSD card on cameras like EZVIZ and Wyze. It doesn’t allow 24/7 continuous video recording (only saves activity clips) and has no loop recording mode (stops recording when full).
Note:
Blink XT2 Outdoor/ Indoor smart security camera doesn’t support the free local storage on the latest Sync Module 2. The same applies to the original XT, as well as the first-generation indoor camera. Thus, the only free storage you get here is the 7200 seconds of cloud (only available to old customers).
A Step-by-Step Guide on How to Add Blink camera to Sync Module
Overall, the process to add a Blink camera to Sync Module is pretty straightforward for even a non-techie. It’s also the same whether you have the old Sync Module 1 or the Gen 2, as shown below:
What You’ll Need:
- A stable WiFi connection
- The power adapter & cable
- Your Blink Sync Module
What to Do:
- Install the latest Blink App to your smartphone or tablet and create an account (if you don’t have one).
- Launch the Blink app and while on the home screen, tap the “+” icon on the top right to open the “Add Device” window. It will list down the kind of device you’d like to add. Choose the Blink wireless camera system option
- Enter the Serial Number of the Sync Module in the new input box that appears. You can find the serial number at the back of the device. But if you don’t want to enter the number manually, tap the camera icon to scan the QR code. (The app will ask permission to access the camera of your phone/ tablet).
- Once the QR code (or serial number) you’ve entered is recognized, you’ll get a prompt to “Create a new system”. Enter in the input box the name you’d like to recognize your sync module, then tap the bold “Done” button.
- Power up your Blink Sync Module by plugging it into the electrical outlet. Once it’s on, you’ll have a steady green light on the front bottom indicator and a blinking blue for the top one.
- If your Sync Module, indeed, has the aforementioned light pattern, tap the bold “Discover Device” tab to proceed with the next step
- The next step involves adding the Sync Module to your home WiFi. Thus, click “Join” when prompted to display all the local networks within range. If your home WiFi isn’t available, tap the “Refresh List” at the bottom right
- Once available, select your WiFi network name and enter the correct password. Then tap the “Join” button to initiate the network configuration
- At this point, you’ll receive a “Sync Module added to…” success message. Tap the “Done” tab to complete the setup process and return to the home screen. But we’re still not done yet.
- On the home screen, tap the Add Device icon “+” again to start adding your Blink camera to the Sync Module.
- On the “Add Device” window, select Blink wireless camera, whereby it will ask you to enter the serial number
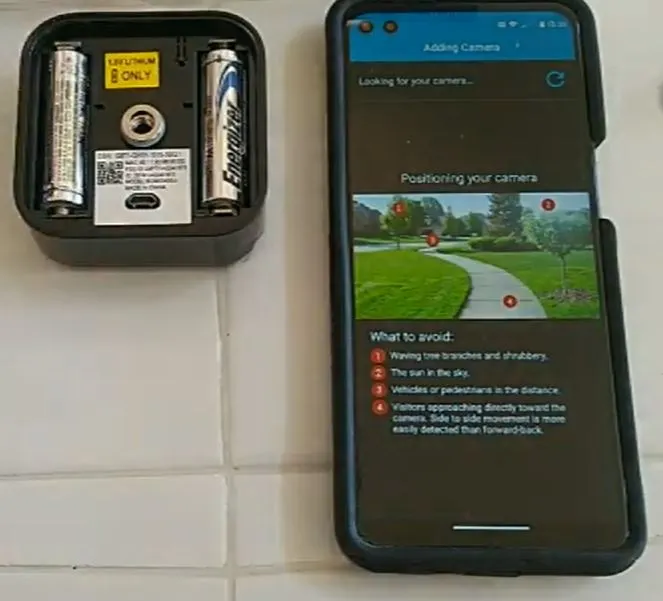
- Enter the serial number of the Blink camera manually or tap the camera icon to scan the QR code. (the sticker for serial number/ QR code is on back of the camera in Mini-series and inside the battery compartment for other models.
- If the Serial Number/ QR Code is valid, your Blink camera will be successfully added to the Sync Module. Click Done to now finalize the process.
If new to Blink, you’ll get a prompt to link your account with that of Amazon to take advantage of the subscription features. Once done with that, the app will take you back to the Home screen, whereby you can now view your camera/s.
Make Sure Your Blink Has Strong Signal
Well, that’s our quick guide on how to add a Blink camera to the sync Module. And as was mentioned in the beginning, it’s a pretty easy process that takes less than ten minutes- without the installation part.
Speaking of the installation, maintain a strong wireless connection when you mount your Blink camera and Sync module. The radio signal (under the camera system) and WiFi signal (under the Sync Module system) indicator should have three bars.
So, it will be best to first do all the configuration setup on the table, near the router. Then finish up with the rest of the mounting (on the wall, ceiling, soffit, tree, et cetera) when everything is already working.